H-Sphere 3.x end-user series
1. How to edit your AntiSpam settings in H-Sphere
This tutorial assumes that you've already logged into your H-Sphere control panel
Now let's learn how to edit your AntiSpam settings in H-Sphere
1) Scroll over Mail Info
2) Then click Mail Manager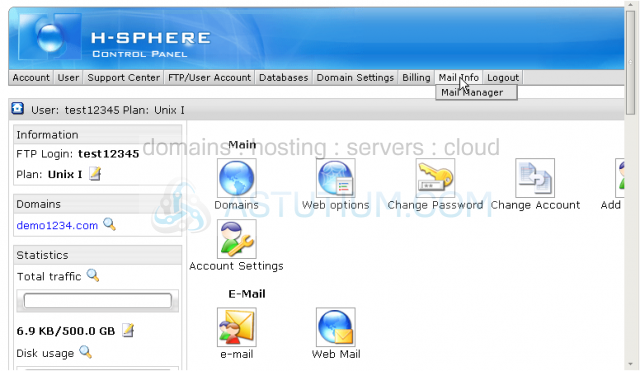
3) Be sure to select the correct domain name here if you have more than one domain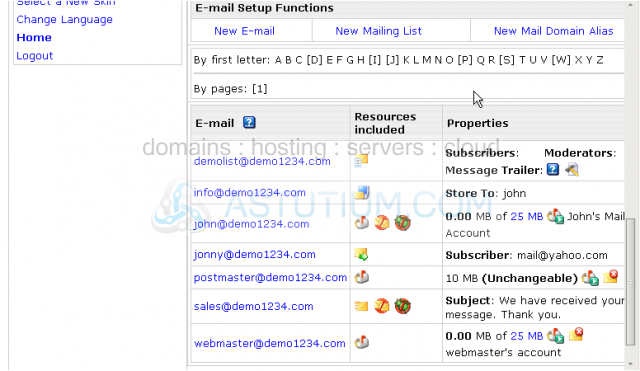
Scroll down
Your AntiSpam settings can be different for each of your email addresses or may be identical for all mail resources in your account
4) For the email address you want to configure click the corresponding AntiSpam icon here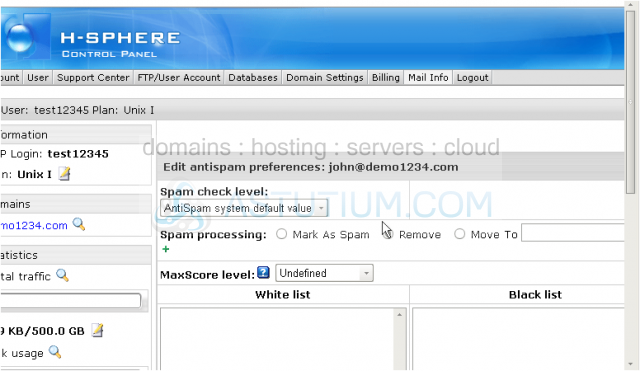
5) The first thing you do is to select the Spam check level which determines how aggressively your mail will be filtered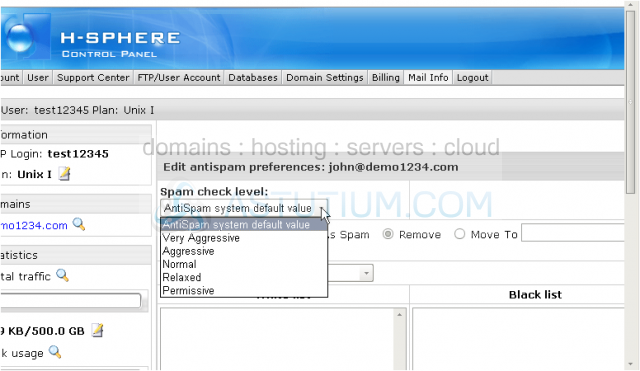
6) Let's choose Normal which will block various messages from mailing lists and obvious spam emails
7) Now let's choose the way we want spam emails to be handled...in this case let's move them to another email address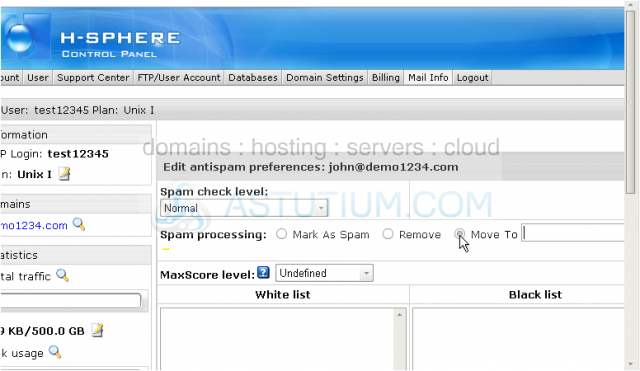
MaxScore level is the alternative scoring method of evaluating spam which comes to your mail account
If left as Undefined the Spam check level above will be used. Otherwise, MaxScore level will be used and emails identified as being spam will automatically be removed, regardless of your Spam processing selection above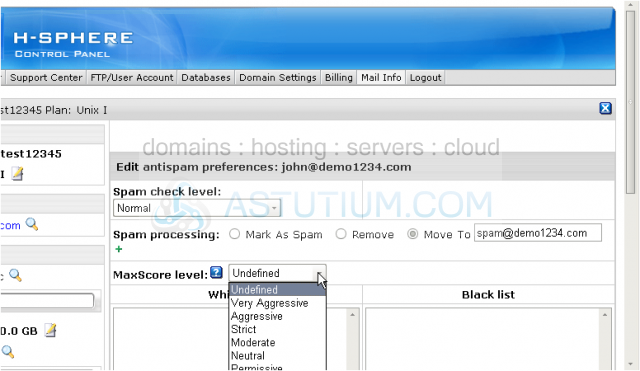
Scroll down
There will definetely be email addresses which you would like to accept. By adding these mailboxes to the White list you will make the system to deliver the messages coming from the addresses specified here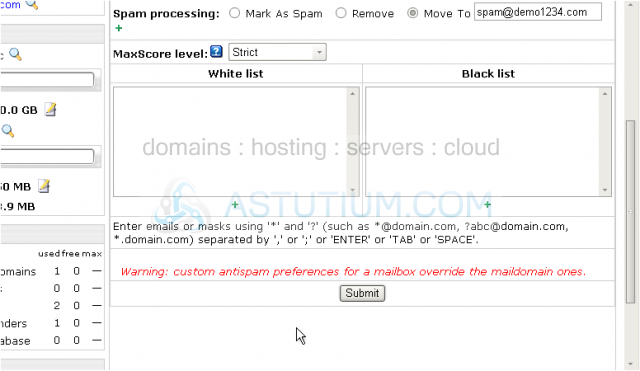
You may also need to identify some of the email addresses that you definitely DO NOT want to accept. By adding them to the Black list the system will mark the messages as spam and will process them accordingly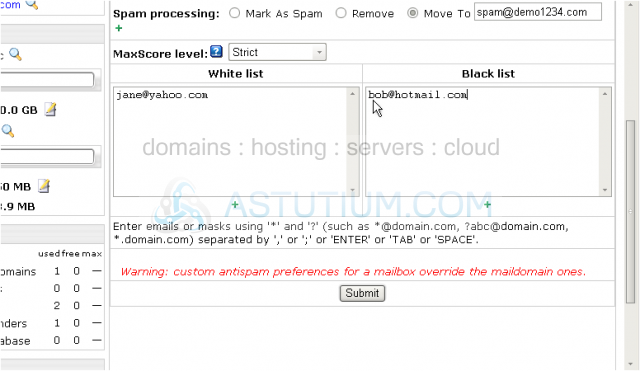
8) When finished click on Submit button to save your changes
We're done! The AntiSpam settings have been configured for this email address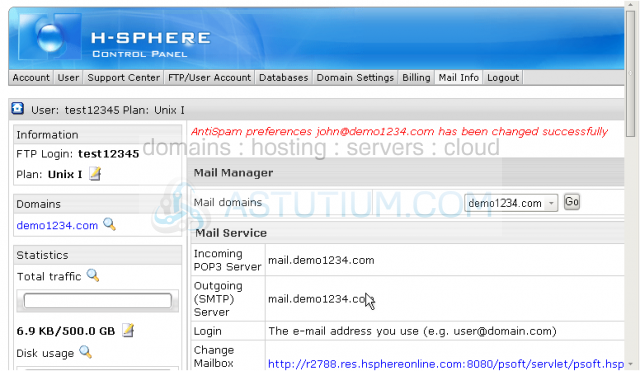
Scroll down
9) Now let's configure AntiVirus settings for our email address...for this click AntiVirus icon here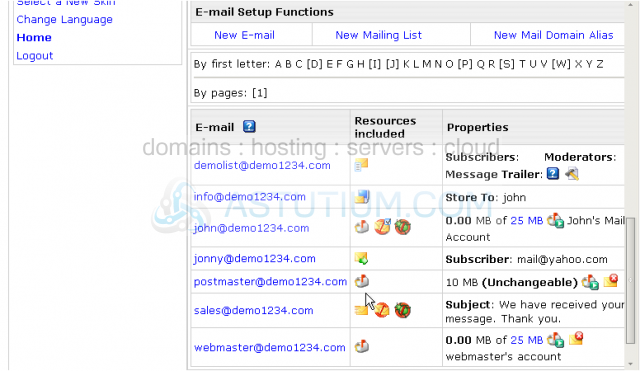
In this case we simply want to remove anything tagged as virus from our account
You may tag an email as virus according to the attachment's MIME Type. By default, it is Disabled
10) Let's choose Allowed MIME Types option which will let you receive the emails of only certain MIME Types. The other emails will be rejected in this case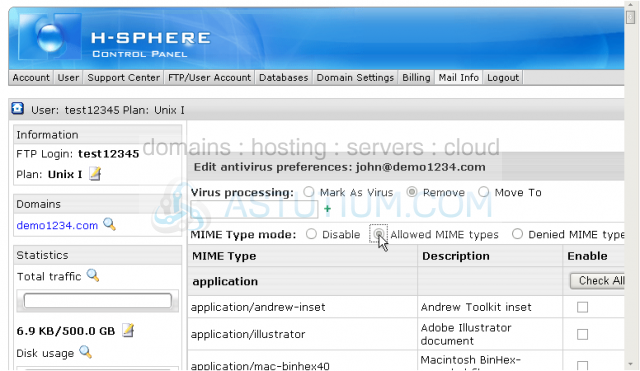
The MIME Types are grouped into sections so you can use Check All options to mark all the section or check the specific boxes only
11) Let's check a few application MIME Types to see how it works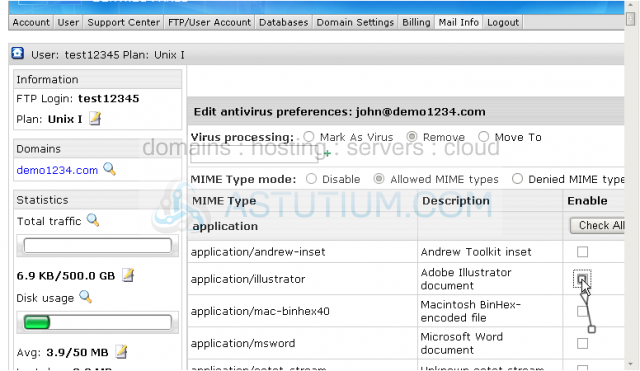
Scroll down
12) When finished click on Submit button to apply the changes to the server
We have successfully configured AntiVirus settings for this email address
Scroll down
If you'd rather configure AntiSpam and/or AntiVirus settings the same for all email addresses in this domain (instead of individually for every email address) you can do so by clicking these icons here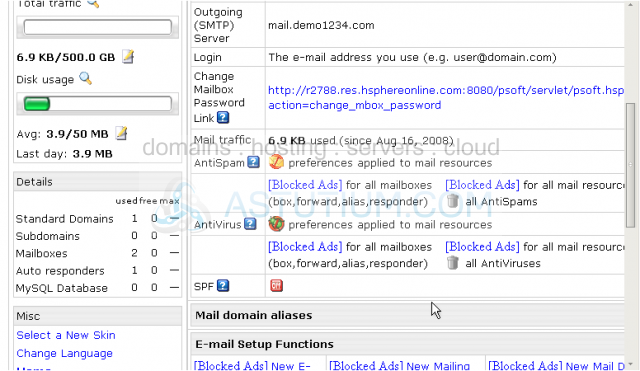
This is the end of the tutorial. You now know how to edit and configure your AntiSpam or/and AntiVirus settings in your H-Sphere control panel. Keep in mind that you may do it individually for every email account or for the entire domain