H-Sphere 3.x end-user series
8. How to create a domain alias in H-Sphere
This tutorial assumes that you've already logged into your H-Sphere control panel
Now let's learn how to create a new domain alias which can also be called a domain pointer
Domain aliasing is a good way of pointing multiple domains to your primary website and making them display the same content without copying and uploading it to different locations
1) Scroll over Domain Settings
2) Then click Domain Info
Scroll down
This is Domain Information page where you can make additions to the current domain's settings and edit its configuration. If you have more than one domain name you will get a list to choose the necessary domain name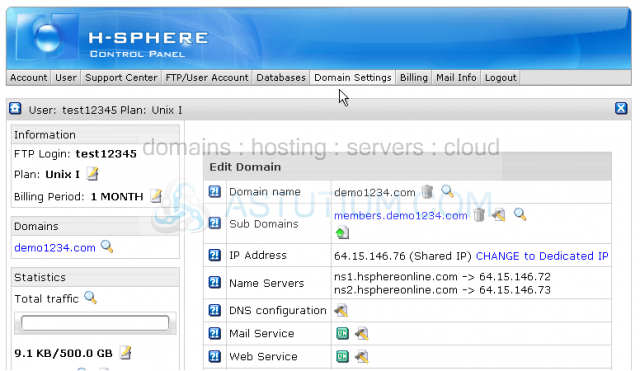
3) Let's add a new domain alias to our account...click Domain Aliases icon here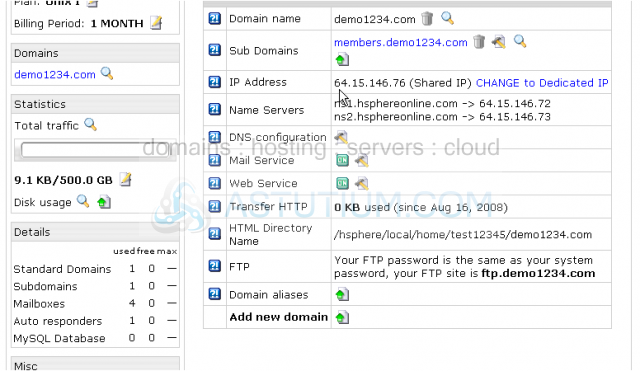
4) Enter the name of the new alias here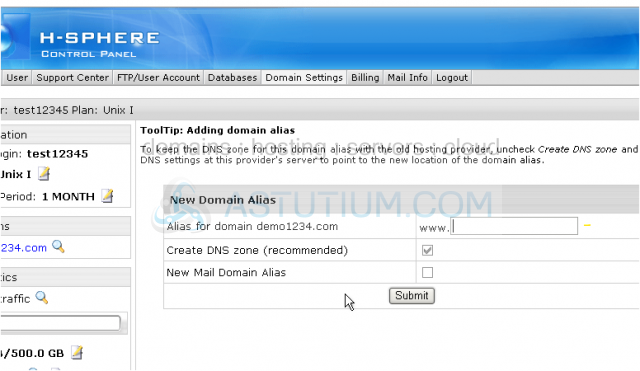
5) To also create a new mail domain alias click here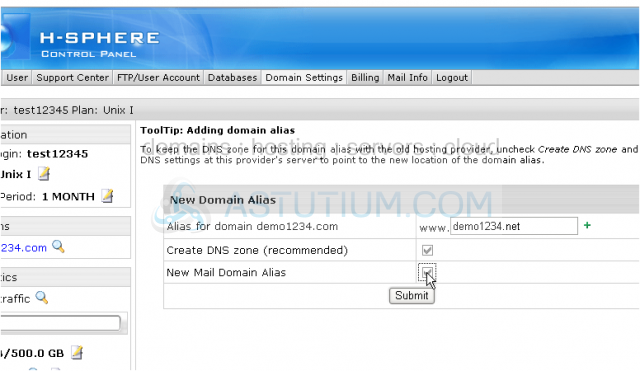
You may add a new mail domain alias at this stage as well or may skip this step and enable Mail Service for this alias later if necessary. In the latter case you will be able to add separate mail resources for this new alias
6) When finished click Submit button
That's it! The new domain alias demo1234.net has been created and will be pointed to your primary website demo1234.com. Note that your domain alias should be a registered domain name in this case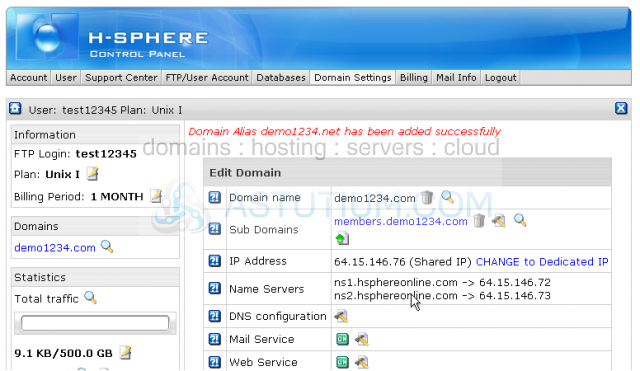
Let's scroll down and take a look...
7) Our new domain alias is listed here... You can delete existing domain aliases by clicking the trash icon here... or edit existing domain aliases by clicking here... or create new domain aliases by clicking the icon here and follow the process described in this tutorial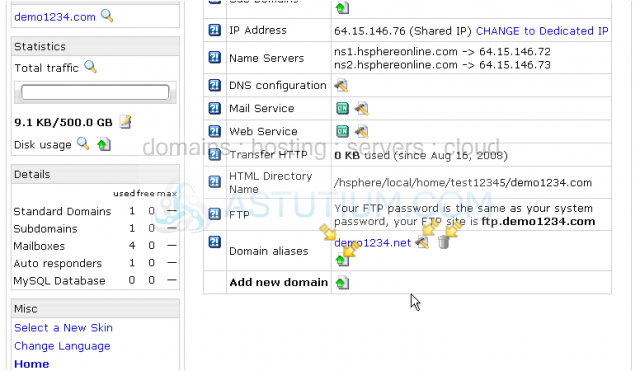
This is the end of the tutorial. You now know how to create, delete and edit domains aliases from your H-Sphere control panel and what they are used for