H-Sphere 3.x reseller series
9. How to login to H-Sphere as a reseller
This tutorial assumes that you have already registered your reseller account and got access to it
Let's log in to your reseller account
1) Enter your account username here
2) Then enter your account's password here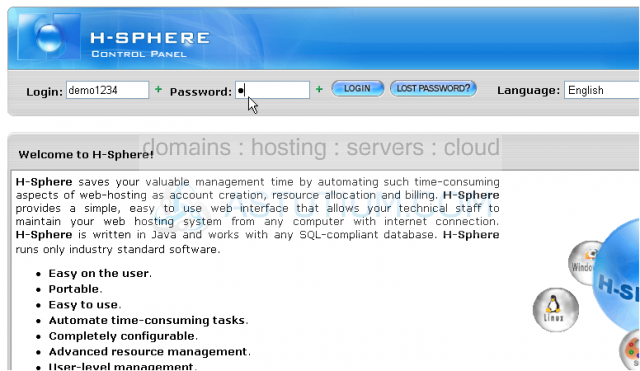
3) After click Login
This is Reseller Billing interface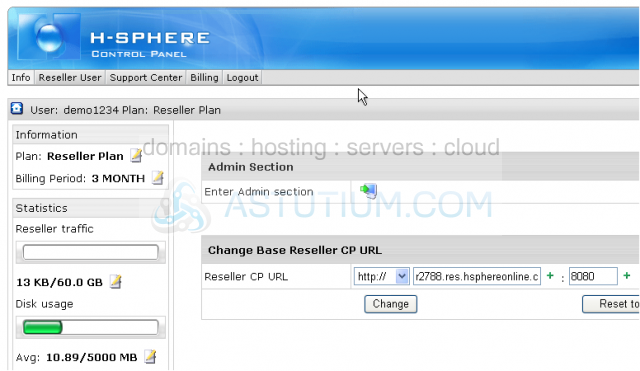
You may switch to Reseller Admin section by clicking this icon here. The Admin section will open in a new window in this case...however, there is an alternative way of switching between panels
Scroll down
4) To switch to Administrative account click here
This Menu link allows switching between admin and billing accounts and keep the section open in one and the same window
Here you may create Plans and adjust their settings
5) To go back to reseller billing account click here
Once you complete the system configuration you may change your temporary CP alias to your own Reseller CP URL
6) Select either http or https here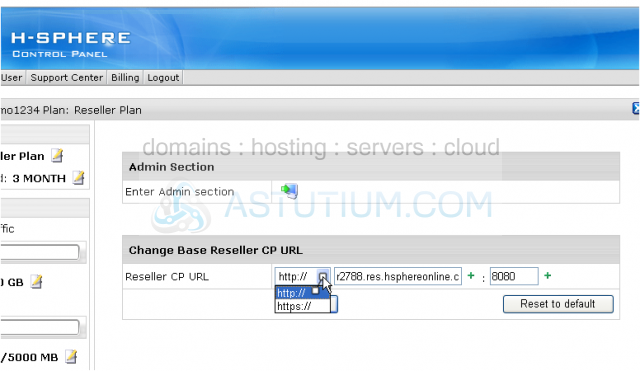
7) Then change temporary CP alias to your own reseller CP URL here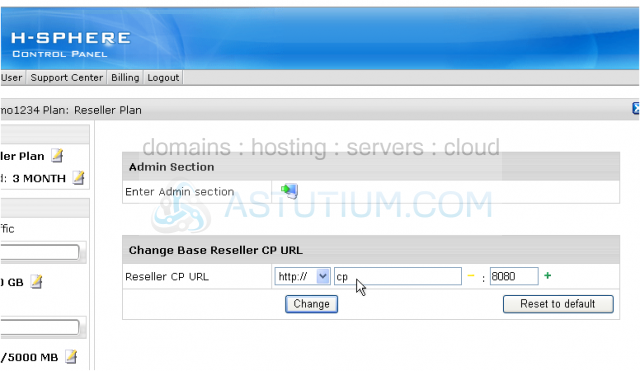
8) After click Change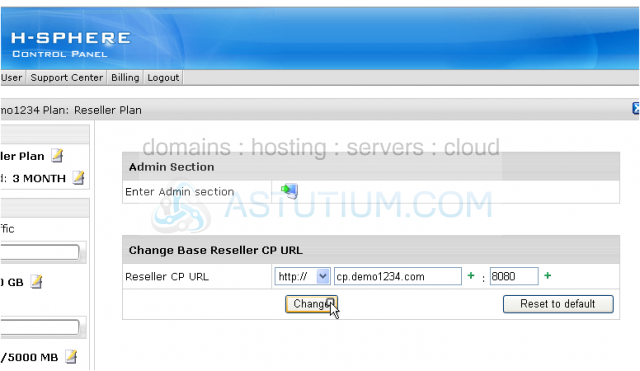
9) If needed you may always restore this value to default here...let's change it back now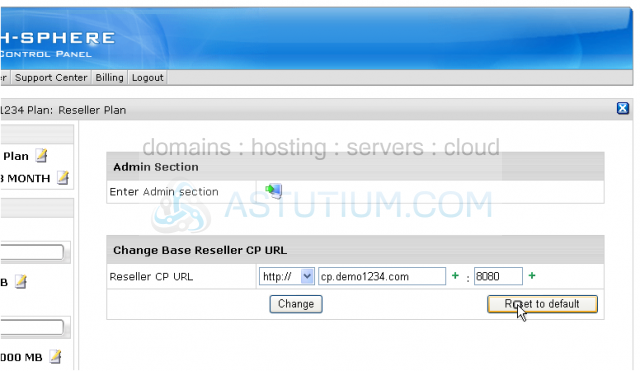
That's it! We've successfully restored your temporary CP alias
This is the end of the tutorial. You now know how to log into your Reseller account, access your Reseller Admin and Reseller Billing sections and switch between them. Also we have learned how to change your temporary CP Alias to your own Reseller CP URL