WHM 11 services series
11. How to configure your outgoing mail server in WHM (SMTP)
Having a secure SMTP server is very important. If your server is insecure, it's very likely to be exploited by spammers at some point in time. Relaying spam is against the Terms of Service of most reputable hosting providers, so it is your responsibility to ensure that your server is not exploited.
To prevent spam from being sent through your server, you'll need to keep a watchful eye on your server's mail logs and statistics. Also, be sure that your server's settings stay secure by not compromising them with unnecessary changes.
Exim, the only outgoing mail (SMTP) server available for cPanel/WHM, has a sizeable list of settings you can change to your liking.
1) Its configuration page can be found under Service Configuration.
2) Click Exim Configuration Editor.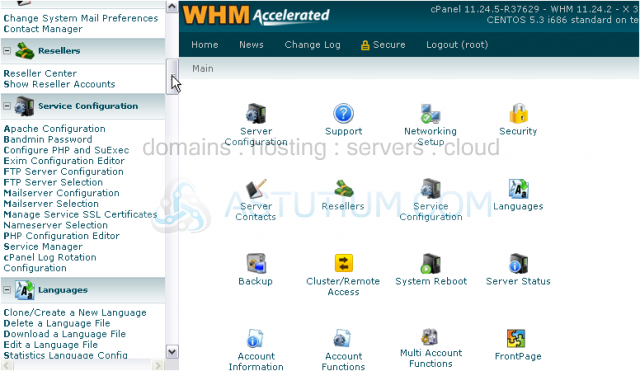
You probably noticed that some of the options faded out as soon as the page loaded. Checking or unchecking certain settings on this page will activate or deactivate those settings (and others).
Each option here lists a brief description that should help you determine its purpose; a longer description is accessible by clicking the question mark link [?] next to the option.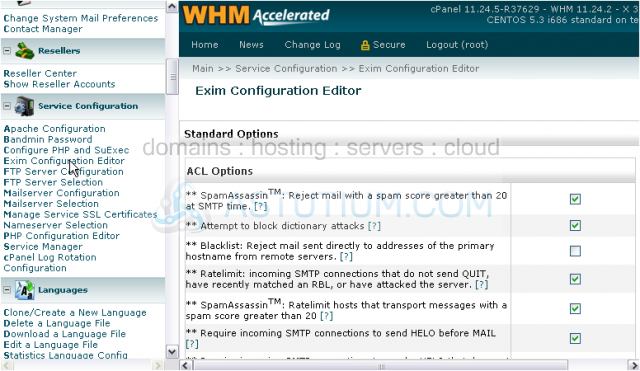
All of the options should be left as the defaults unless you have good reason to change them.
The first group of settings contains Access Control Options. These settings affect blacklisting, spam control, and other security-related issues.
With the Access Lists, you can explicitly allow certain hosts access to your SMTP server, even if they trigger your security measures. This is known as whitelisting. Explicitly denying access in a similar fashion is known as blacklisting.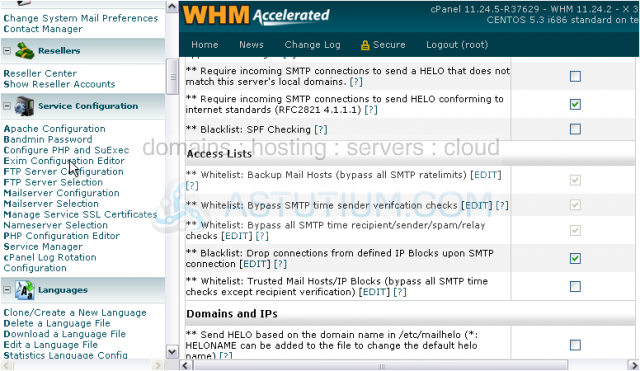
As you can see, the first three options are enabled by default and cannot be disabled.
Each option in this section has an [EDIT] link which can optionally be used to whitelist or blacklist a host or IP address, as described.
The Domains and IPs settings let you control which domain names and IP addresses the server will use to send mail.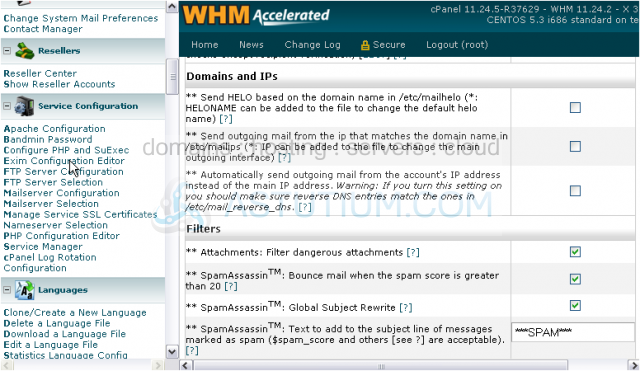
Use the options under Filters to adjust attachment filtering and SpamAssassin filters. You'll see more SpamAssassin settings later.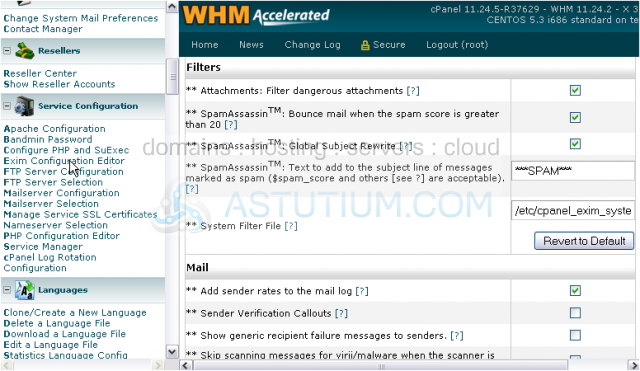
Mail contains more conditions that can be checked before an e-mail message is sent.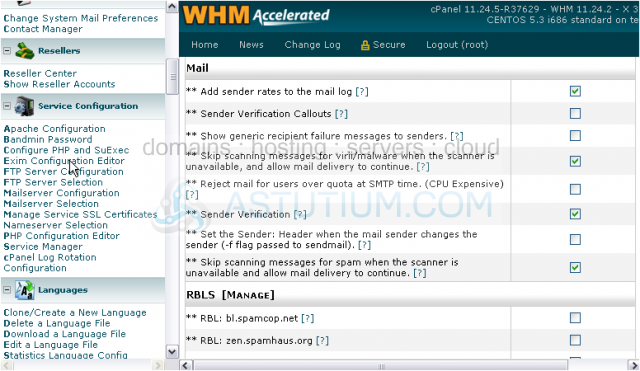
RBLs are Real-Time Blacklists containing IP addresses that have been known to send large quantities of spam. If you enable an RBL and the sender's host is in the list, their e-mails will be rejected.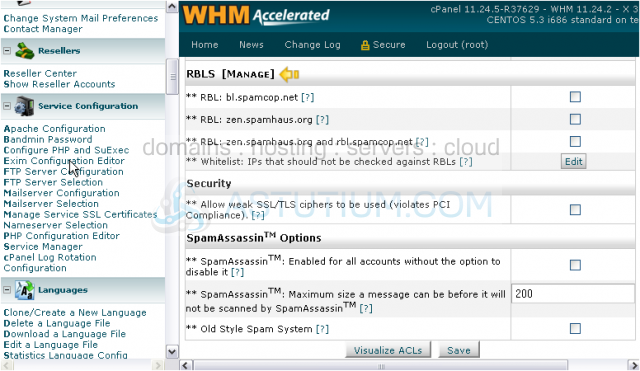
You can choose to use the two default RBLs individually or collaboratively. Additional RBLs can be added using the [Manage] link, at left.
Note that RBLs are not foolproof, and often result in false positives. If you enable an RBL and start receiving legitimate complaints from clients having trouble sending mail, try disabling it.
This section also contains a whitelist that can be used to specify IPs that should not be checked against RBLs. Edit this list with the Edit button, below.
You should leave the only Security option disabled; turning it on allows weak encryption to be used when connecting via SSL or TLS.
The final block of options relate to SpamAssassin. With the first option, you can force enable SpamAssassin for all accounts, meaning it cannot be disabled in cPanel.
If you wish to disable SpamAssassin server-wide, this can be done on the Tweak Settings page. Check out the relevant tutorial near the end of the previous series for details about that page.
You've seen all the standard settings on this page. If you would like to view a diagram of your access control settings, click the Visualize ACLs button below.
Further down this page, you'll find the Advanced Editor. This gives you complete access to modify the Exim configuration file. Any direct changes to that file will be overwritten when Exim is updated or reinstalled, so you should always use this editor.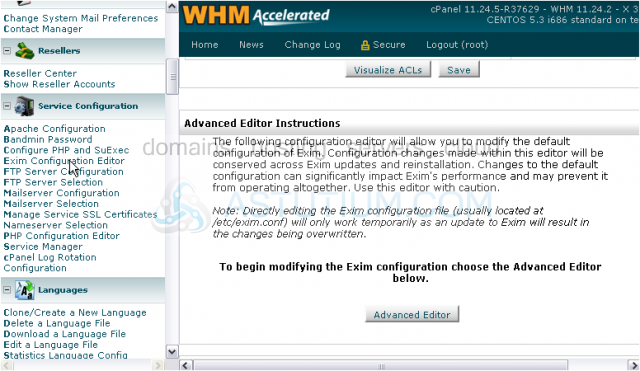
Pay attention to their warning: Changes to the default configuration can significantly impact Exim's performance and may prevent it from operating altogether. Use this editor with caution.
You can reset part or all of the Exim configuration to the defaults using these two buttons.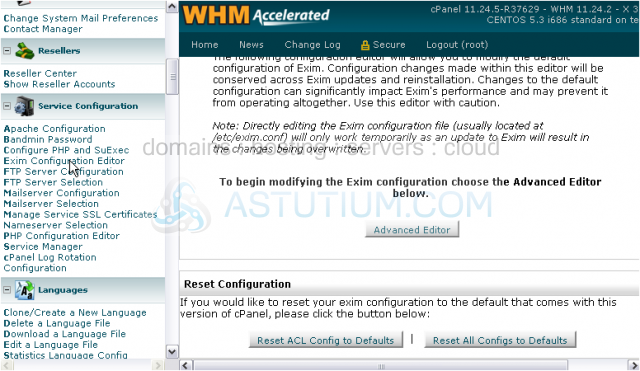
3) Click Save.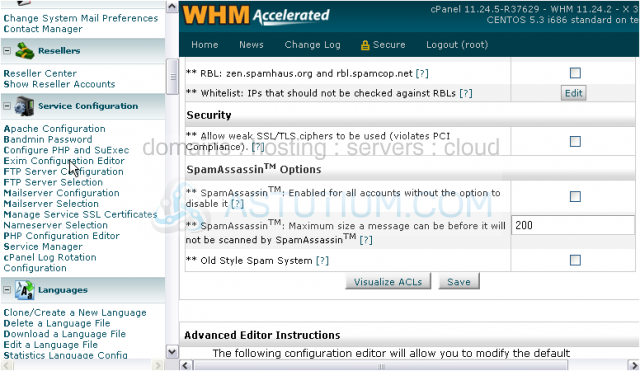
Wait for the settings to save and the Exim service to restart.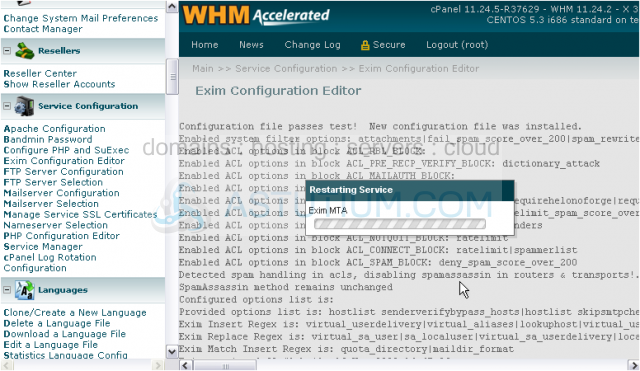
That's it! You now know how to configure Exim, the outgoing mail server used by WHM.