WHM 11 accounts series
31. How to copy multiple accounts from another server to your WHM server using SSH
Copying a hosting account from a remote server to yours is a fairly straightforward process. You can even copy multiple accounts at once, as you'll see in this tutorial.
If you watched the previous tutorial, you should already know how to transfer a single account.
For the method we'll be using in this demonstration, you will require root SSH access to the server. We will be transferring multiple accounts from one cPanel server to another. The benefit of this method, though, is that the server doesn't even have to be a cPanel server for this to work.
1) Find the Transfers menu.
2) This time, we'll go to Copy multiple accounts/packages from another server.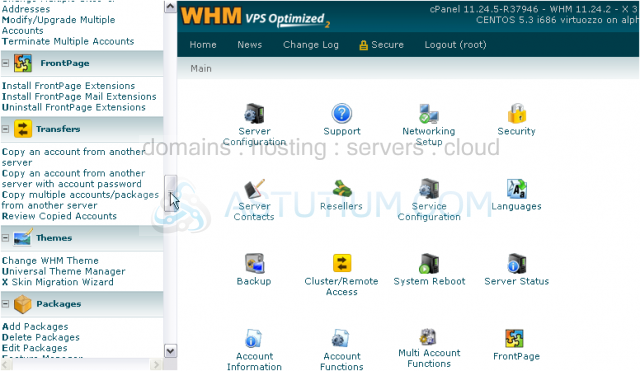
3) Clicking that link will open up a new window. We've focused on the important frame.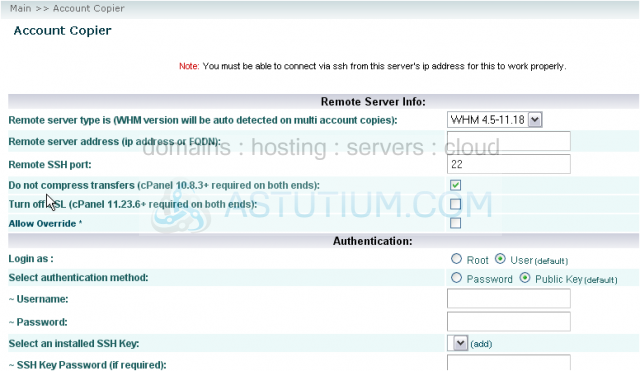
4) Open this drop-down menu to select the remote server's control panel and version.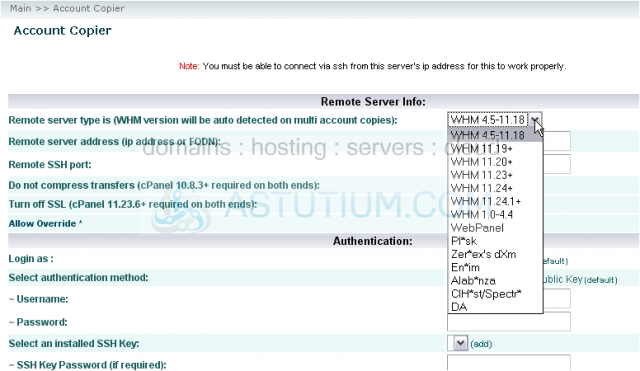
As you can see, the names of some of cPanel's competitors have been censored, but they'll all still work.
With multi-account copies such as the one we're performing, the WHM version will be auto-detected. For now, just pick your best guess in the list.
5) Our remote server's WHM version is 11.24.2, so we'll pick this option.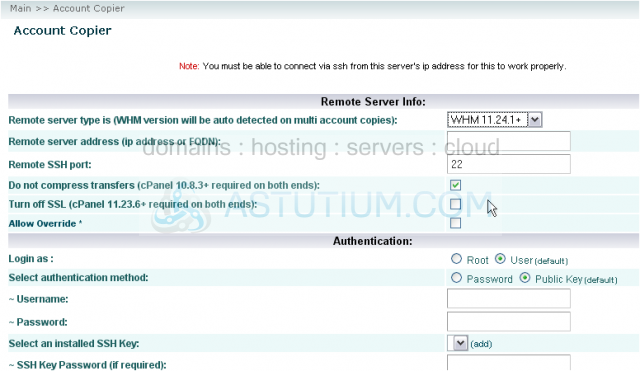
6) Now, enter the remote server's hostname or IP address.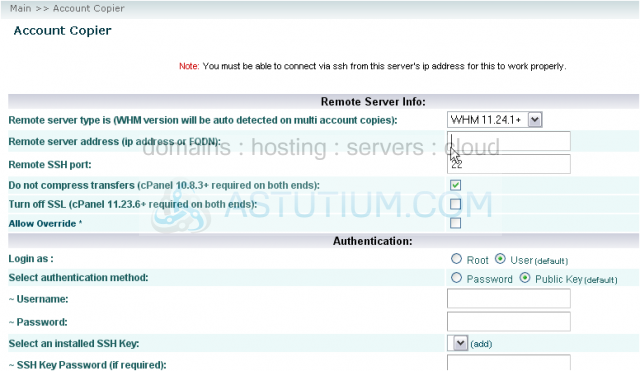
7) Ensure that the Remote SSH port is correct.
After a moment, you should see a message such as this one appear in bold. WHM is just verifying that it can connect to SSH on that server.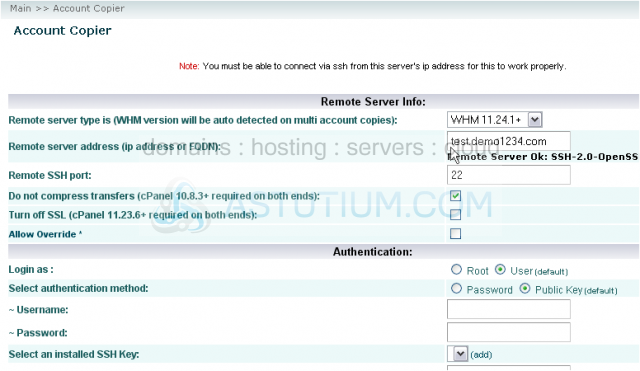
These next three options should be fine left alone, unless the remote server is not a cPanel server or it's running an old version.
Next, we need to fill in the Authentication information. What you need to enter depends on how the server in question is set up.
If your server is set up to block direct root SSH access -- which is best, for security purposes -- you'll need to specify the name of an admin user on the system that can switch users to root.
Choose the correct authentication method, and fill in a password for the user. If you'll be using Public Key SSH access, you'll need to select or add an SSH key and enter its password, if required.
Then, scroll down and choose the correct root escalation method. If you'll be using su, you'll need to also enter the server's root password.
8) If, on the other hand, you'll be using direct root SSH access, click the button next to Root.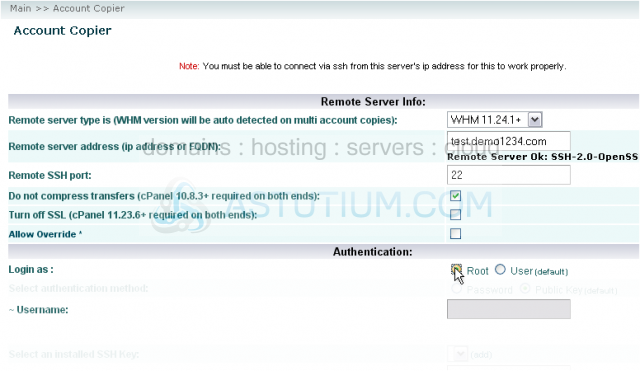
The form will update to reflect the change.
9) We'll change our authentication method to Password.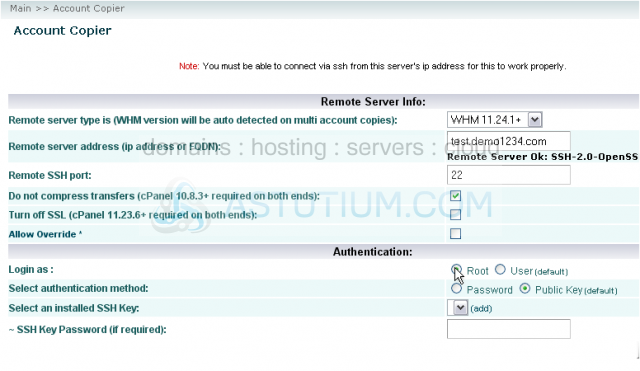
10) Enter the Root Password for the server.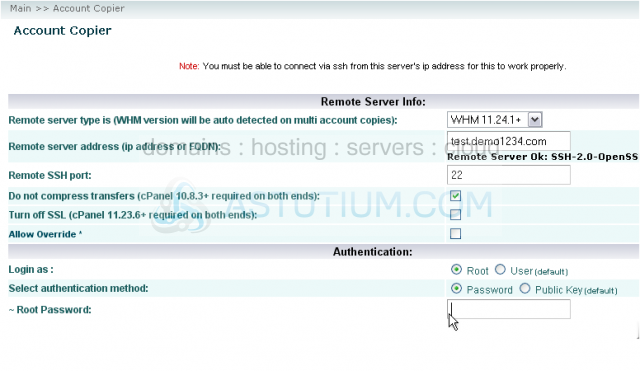
11) Click Fetch Account List.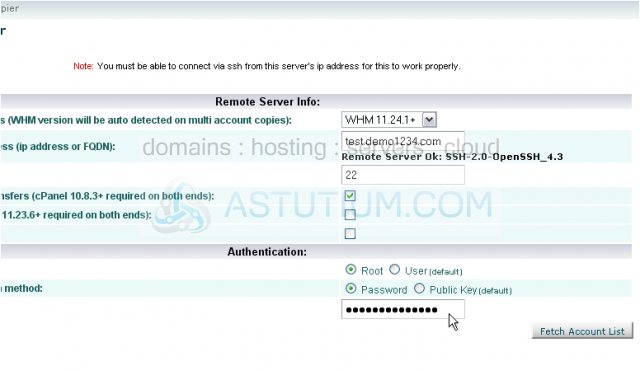
Your local WHM server will connect to the remote server and fetch a list of all packages and accounts on that server.
12) Click this button above the package list to Select All packages.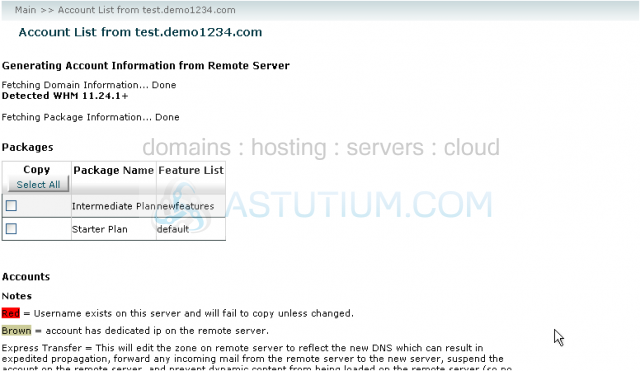
Now, for the accounts. All of the accounts on the remote server should be listed below.
13) Press this button to Select All accounts.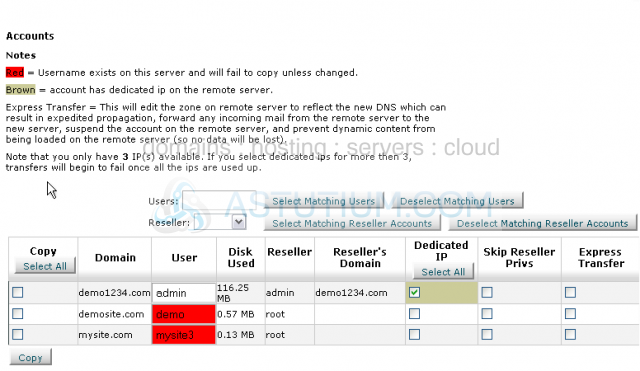
You can also use the search tools above the account table to control which accounts are selected.
Also, you might want to read over the Notes above; we will be giving you a summary, however.
Usernames highlighted in red already exist on this server and will fail to copy unless changed. Let's fix those usernames now.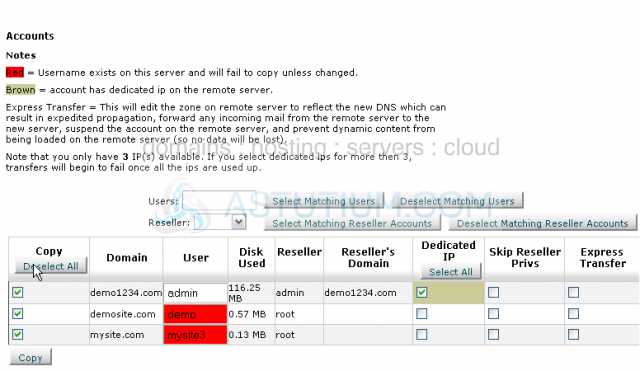
14) Use the text fields here to edit the duplicate usernames.
Notice that the usernames have now faded from red to white.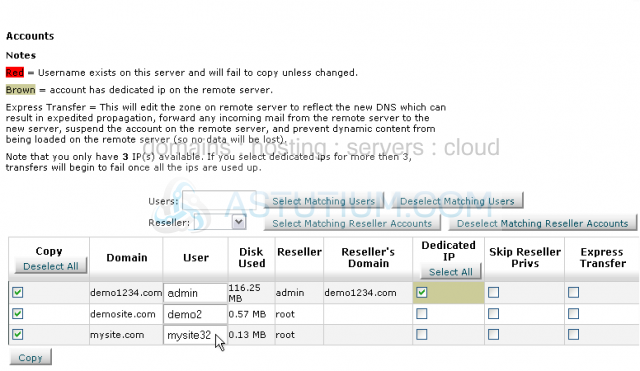
As you may have read in the notes, any account that has a dedicated IP on the remote server will be marked below in brown.
Remove the checkmark if you don't want this account to have an IP on the destination server.
Take note of how many IP(s) are available, as WHM informs you up here. If you assign more dedicated IPs than you have available, transfers will begin to fail once all the IPs are used up.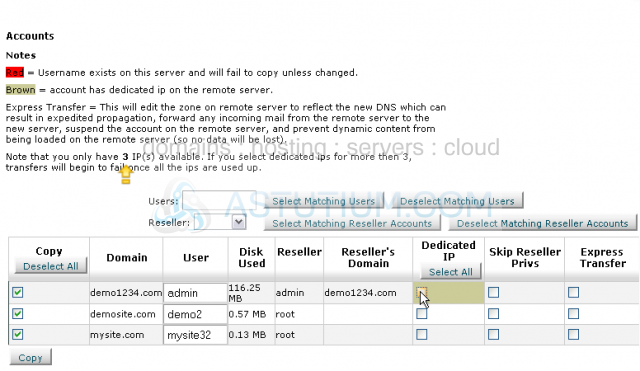
15) Check this box for an account if you don't want the account's reseller privileges to be transferred.
You might want to enable this option; it can decrease the downtime of a moved account, as described in the notes above.
16) When ready to transfer the accounts, click the Copy button.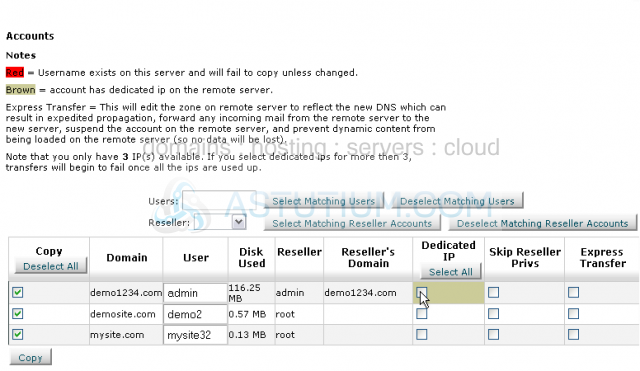
Pay attention to the warning that pops up. Closing the window or pressing the back button during the account copy process will cause it to fail.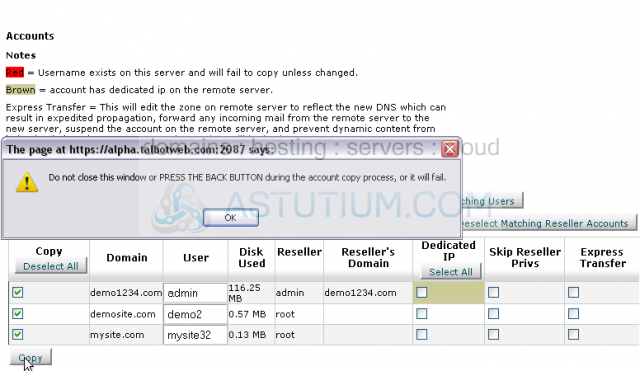
We will now adjust the view to show the rest of the frames.
Now, each account will be transferred over, extracted, and then generated -- one at a time. The file transfers may take a while, depending on the size of the users' home directories.
You will see a list detailing the Copy Status at left, and a percentage bar to the bottom right.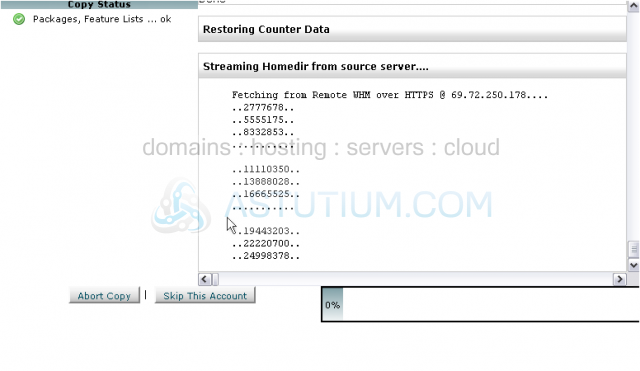
You may abort the copy or skip an account using the buttons below.
17) When the copy is complete, you will receive another alert message. Pay attention to the warning not to press the back button. When done here, you should instead close the window.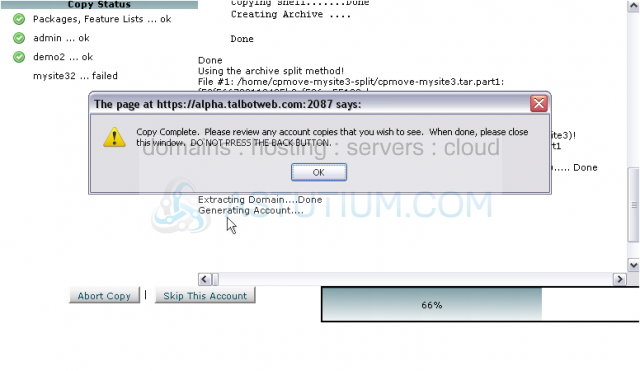
As you can see, all but one of our transfers succeded. Let's find out why the last one failed.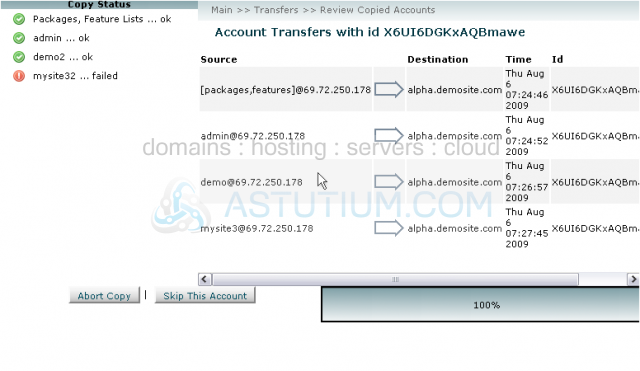
To the right of every transfer row in the summary, you'll see a link allowing you to view that transfer's log.
18) Click the View Log link for the failed transfer.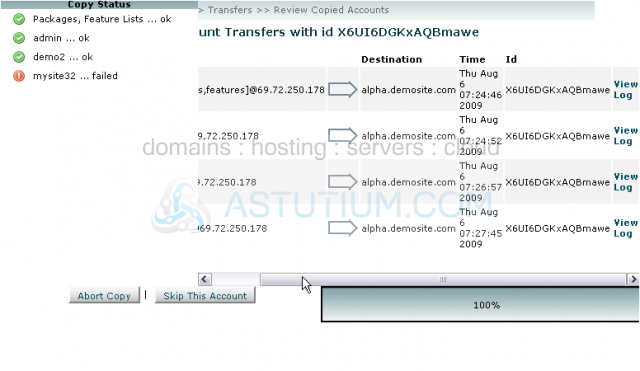
19) Scroll through the log until you've found an error message.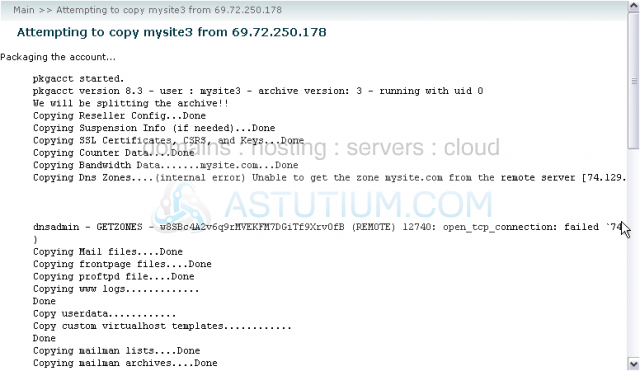
At the very bottom, we can see that the account creation failed because the domain name is already in use.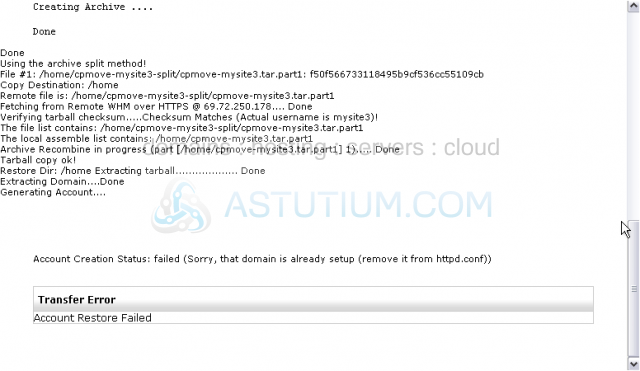
Hopefully, if any of your transfers failed, the error will be just as descriptive. That way, you'll be able to fix the problem on your own before attempting the transfer again.
This is the end of the tutorial. You now know how to transfer multiple accounts from another server to your cPanel/WHM server.